


Ready or Not is a tactical first-person shooter that places you in the boots of an elite SWAT officer. Unlike traditional shooters, this game emphasizes realism, restraint, and strategic thinking. Every mission is a puzzle of threats, hostages, and unpredictable environments. Whether you're new to the game or looking to refine your skills, this guide walks you through ten key phases of gameplay—from preparation to post-mission review—offering practical tips and insights to help you succeed.
1. Mission Briefing: Decode the Situation
Before you even touch your gear, the mission briefing provides crucial intel. It’s not just flavor text—it’s your tactical roadmap.
Pay attention to details like suspect behavior, number of civilians, and environmental hazards. A nightclub mission might involve loud music and flashing lights, while a suburban home could have tight hallways and multiple entry points. Tailoring your approach based on the briefing is essential.
Key briefing elements to watch for:
- Suspect count and weapon types
- Civilian density and risk level
- Environmental complexity and layout
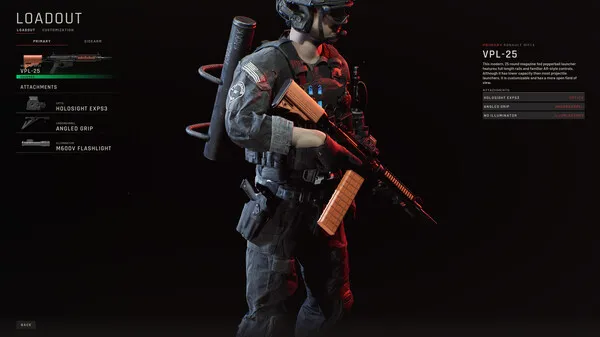
2. Loadout Selection: Gear Up Smart
Your equipment defines your tactical options. Ready or Not offers a wide array of weapons, armor, and utility tools. Choosing the right loadout depends on the mission type and your role in the team.
For stealth missions, go with suppressed weapons and light armor. For high-threat environments, heavier armor and breaching tools are a must. Utility items like mirror guns, door wedges, and flashbangs can make or break a mission.
Suggested loadouts:
- Hostage Rescue: Beanbag shotgun, taser, mirror gun, light armor
- Active Shooter: M4A1, flashbangs, heavy armor, breaching shotgun
- Bomb Threat: SMG, toolkit, door wedges, medium armor
3. Entry Planning: Breach with Purpose
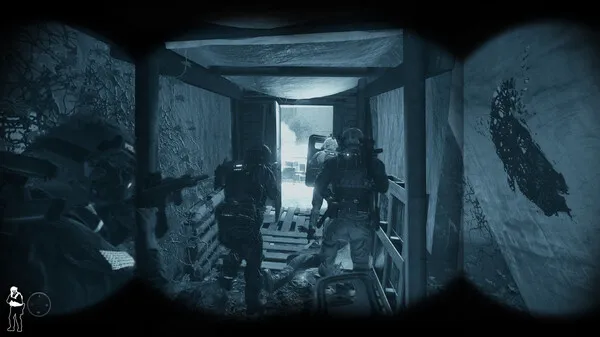
The first moments of a mission are critical. Charging in blindly is a recipe for disaster. Instead, use tactical tools to gather intel and control the environment before breaching.
Use the mirror gun to scout under doors. If suspects are visible, deploy a flashbang or stinger grenade before entering. Stack your team properly—one covers left, one right, and one secures the rear. Communication and timing are everything.
Breaching techniques:
- Silent Entry: Pick locks and use suppressed weapons
- Dynamic Entry: Breach with flashbangs and speed
- Controlled Entry: Wedge doors and clear methodically
4. Room Clearing: Precision Over Speed
Once inside, clearing rooms requires discipline. Always check blind spots, corners, and behind furniture. Suspects may hide or ambush from unexpected angles.
Use lean mechanics to peek around corners. Move slowly and deliberately. If a suspect is spotted, issue verbal commands before engaging. Flashbangs are useful for disorienting enemies in tight spaces.
Room clearing tips:
- Slice the pie: Peek gradually around corners
- Communicate: Call out threats and positions
- Secure: Always restrain and report after clearing
5. Civilian and Suspect Management
Not everyone in the mission is a threat. Civilians may panic, flee, or ignore commands. Suspects may surrender or fake compliance. Your job is to assess behavior and respond appropriately.
Use verbal commands first. If ignored, escalate with non-lethal force. Tasers and beanbag rounds are effective for subduing suspects without lethal damage. Always report secured individuals and evidence.
Behavioral indicators:
- Civilians running toward danger need restraint
- Suspects holding weapons but not aiming may surrender
- Fake surrenders often precede sudden attacks
6. Squad Coordination: Lead with Clarity
Whether playing solo or co-op, coordination is vital. The command wheel allows you to issue orders to AI teammates—stack up, breach, restrain, and more.
Timing and context matter. Don’t send your team into a room without intel. Use “mirror under door” before breaching, and “restrain target” only when the suspect is subdued. In co-op, assign roles and communicate constantly.
Role assignments in co-op:
- Breacher: Leads entry and deploys flashbangs
- Rear Security: Covers back and restrains targets
- Scout: Uses mirror gun and calls out threats
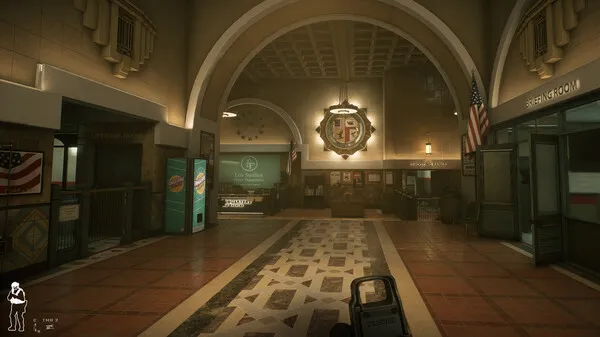
7. Environmental Awareness: Know Your Terrain
Each map in Ready or Not presents unique challenges. From tight corridors in “Neon Tomb” to multi-level layouts in “Valley of the Dolls,” understanding the environment is key.
Use door wedges to control movement and prevent flanking. Flashbangs help clear blind spots. Verticality and lighting affect tactics—suspects may hide in stairwells or dark corners. Learn map layouts through repetition and practice.
Environmental hazards:
- Booby-trapped doors
- Low-light areas requiring NVGs
- Multiple entry points for flanking
8. Time Pressure and Tactical Patience
Some missions are time-sensitive, like bomb threats or active shooters. Managing stress and time pressure is part of the tactical challenge.
Stay calm and prioritize objectives. Divide the map into zones and clear methodically. Avoid tunnel vision—focus on securing areas and reporting evidence. Tactical patience is more effective than rushing.
Time management tips:
- Use mission timer as a guide, not a deadline
- Clear one zone at a time
- Delegate tasks to teammates
9. Scoring System: Play for Professionalism
Ready or Not uses a detailed scoring system to evaluate performance. Points are awarded for securing suspects, rescuing civilians, reporting evidence, and minimizing force. Penalties apply for unauthorized use of force and civilian casualties.
Understanding the scoring system helps improve your tactics. Aim for high professionalism scores by using non-lethal tools, reporting everything, and avoiding unnecessary violence.
Scoring breakdown:
- +15: Securing suspect
- +10: Rescuing civilian
- -20: Civilian death
- -10: Unauthorized lethal force
10. Post-Mission Review: Reflect and Improve
Mastery in Ready or Not comes from reflection and repetition. After each mission, review your performance. What went wrong? What could be improved?
Use training maps to practice breaching, aiming, and command timing. Watch replays, study tactics from experienced players, and experiment with different loadouts. Tactical excellence is a journey, not a destination.
Improvement strategies:
- Set goals for each mission
- Rotate roles to build versatility
- Join co-op sessions for team synergy
Conclusion Ready or Not is more than a shooter—it’s a tactical experience that rewards discipline, planning, and adaptability. From briefing to debrief, every phase of the mission demands attention and precision. By following these tips and refining your skills over time, you’ll evolve from a rookie responder to a seasoned operator. Stay sharp, stay calm, and stay ready